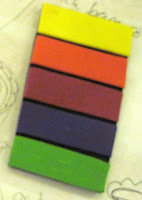
So I covered it in a medium thickness sheet of Playdough and then realised just how much scrap clay I would need! I have only been working with Kato for a few weeks so don't have much scrap yet and my fimo scrap is so much softer than the kato I didn't think it would work very well. Nothing for it but to use good clay :( I figured it would be OK I could wash the playdough off after. Still didn't have quite enough of one colour so added a second layer of playdough too - risky!
Here it is ready to start reduction
So I have never made a cane this big before, only made a non round cane once before and it's Kato and I started making it several days ago - I was worried!
I started of by giving it a whack, I needed to get the clay in the middle moving. After a bit of whacking I tried a bit of pinching and squeezing. This was no mean feat! Slowly but surely it started to shrink in diameter and grow in length.
Here is it part way through the reduction process
I kept on squeezing and pinching and pulling until the outer layer of yellow clay started to crack up and I was worried about ruining my good clay I was using to wrap with. The cane was about 2cm across at this stage and I wanted it down to 1cm (those cake fork handles I am covering are narrow). I thought I would unwrap it, soak the playdough off and then rewrap it and continue. Then the impatient me decided that the clay was moving and if I did that it would be all stiff again. By now it was long so it would be difficult to store and handle. I didn't want to cut it too much as I would get more waste at the ends every time I cut it before finishing reduction. I carefully continued reducing without packing and managed to keep the shape fairly intact. I did have to slightly pinch the tip when I had finished but that was OK .
(Has anyone tried this technique with Kato clay? Do you get cracking? Is it my cane is too big? I will investigate with some smaller canes and will let you know how it is.)
(Has anyone tried this technique with Kato clay? Do you get cracking? Is it my cane is too big? I will investigate with some smaller canes and will let you know how it is.)
This is the useable cane I ended up with (and also a pile of scrap from the ends)
I decided to keep some larger bits of cane in case I wanted to do something else with it . I have way more cane than I will need for the project. I had tried to estimate how much I would need to cover the handles but my calculations were somewhat off. I will go back and look at how I worked it out and see if I can be a bit more accurate next time.
Finished canes (although they haven't been cleaned of playdough yet)
So I can see that I should off put some more larger bolder designs inside the paisley pattern. I wish I had put 2 or 3 flowers and leaves in and not bothered about the little swirly bits. I knew they would get lost in the reduction but I didn't think about the fact the background would look so purple.
Time to get on with covering these handles - I need them in the post by Monday!


